|
|
     aHR0cDovL2ZyZWVzaGlwLmNvLmty aHR0cDovL2ZyZWVzaGlwLmNvLmty
- 특징: 2 Pir Sensor
- 모델 번호: 32-channel stair sensor
- 연결 모드: Wired
- 보증: 2 years
- 증명서: CCC,ce,FCC,ROHS,Ul
- 전압: 12-24v
- 재료: Metal+ABS
- 전원: DC
- 최대 부하 전력: 500W
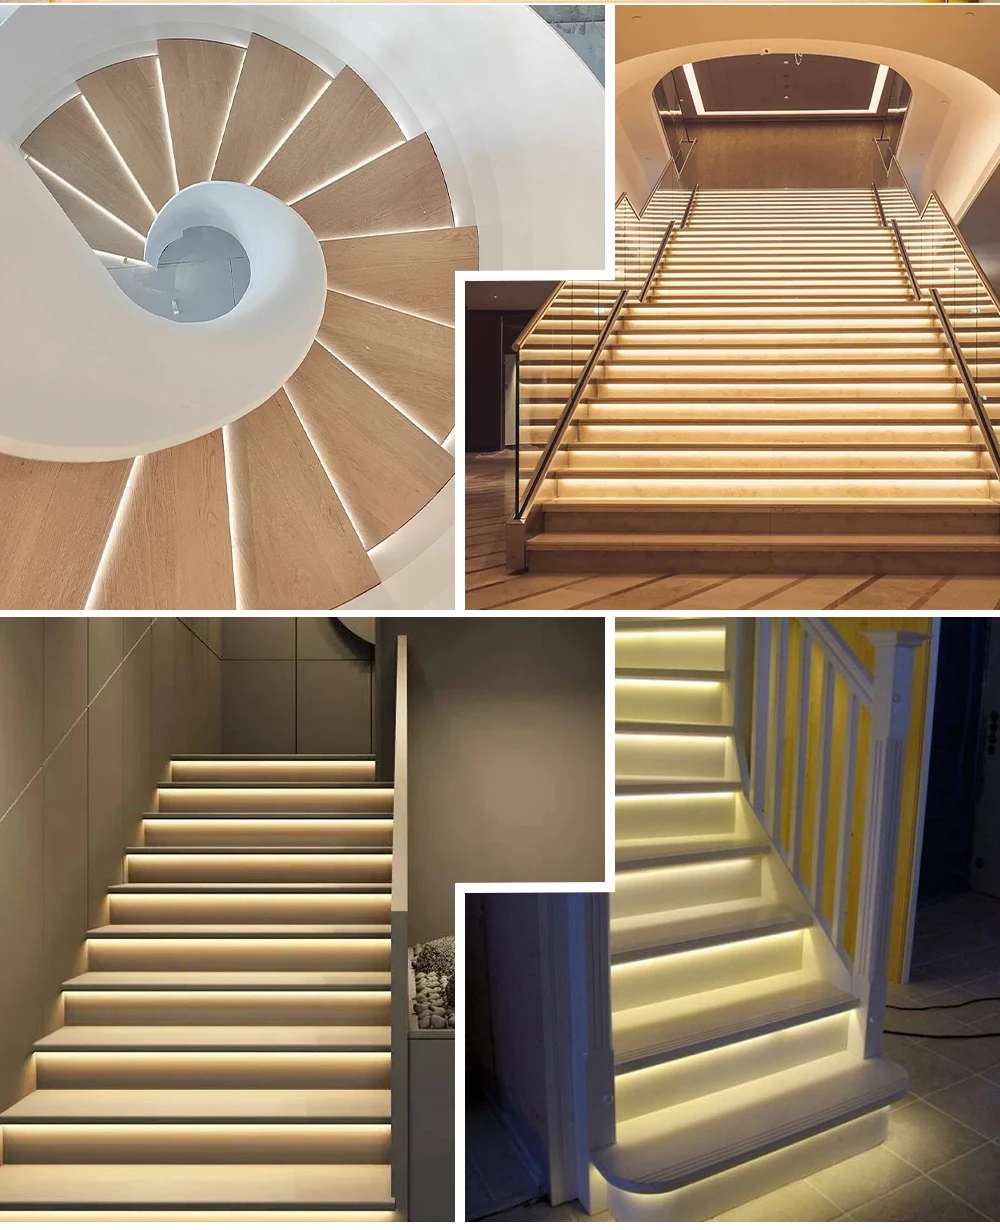
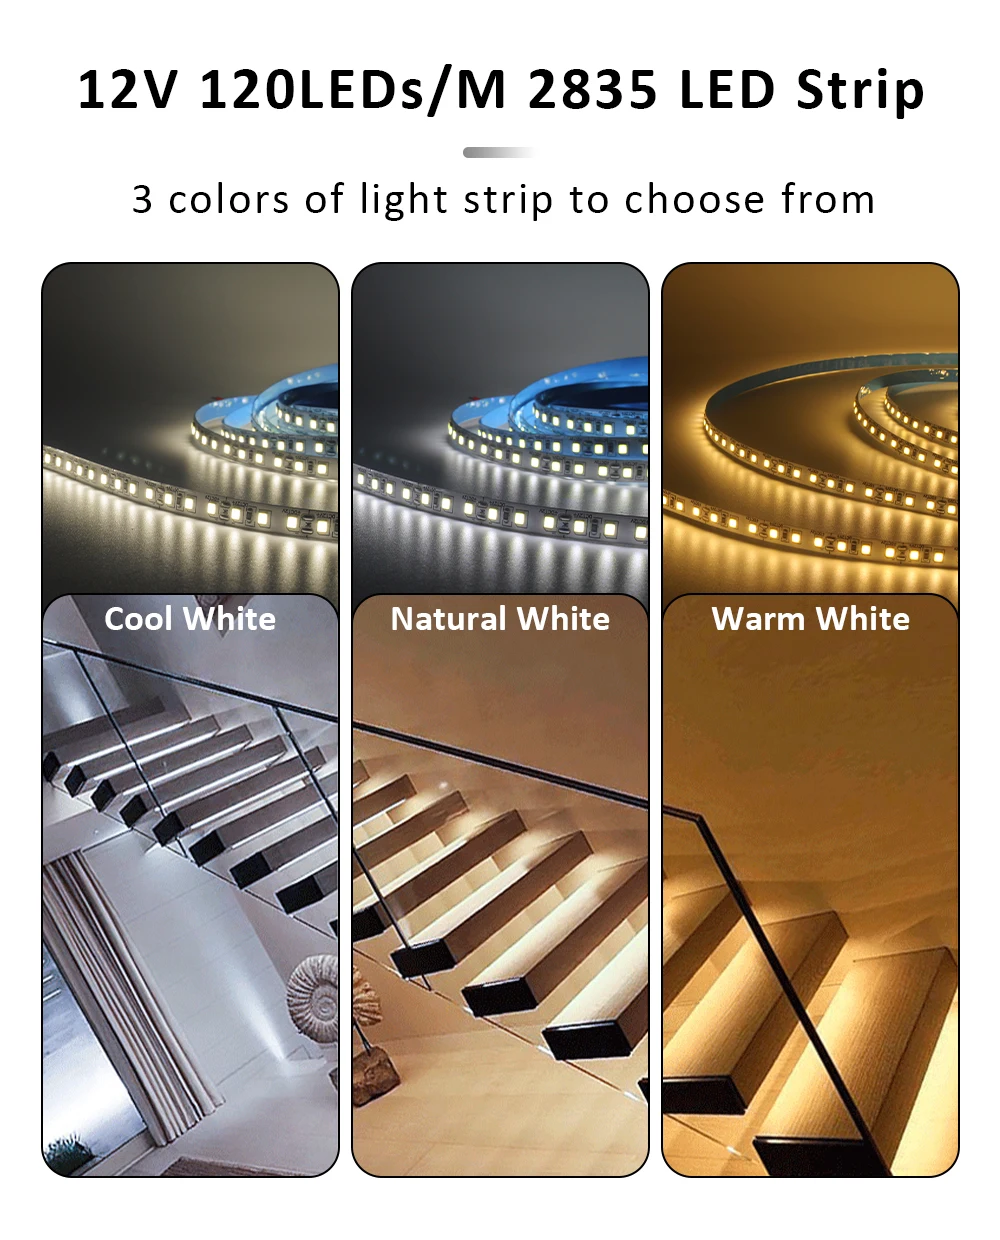
- 적합한 조명: LED Strip
- 제어 방법: PIR Sensor
- 브랜드 이름: WeeTisa
- 원산지: 중국
- 품목 유형: RGB 컨트롤러
- Feature 1: PIR Sensor Stair Light Controller
- Feature 2: stair led pir motion sensor controller
- Feature 3: es32 pir sensor stair light controller
- Feature 4: pir sensor controller for stairs
- Feature 5: lighting controller for stairs
- Feature 6: controller for automatic stairs lighting
- Feature 7: controller for stairs with light sensor
- Feature 8: DC 12v 24v pir motion sensor
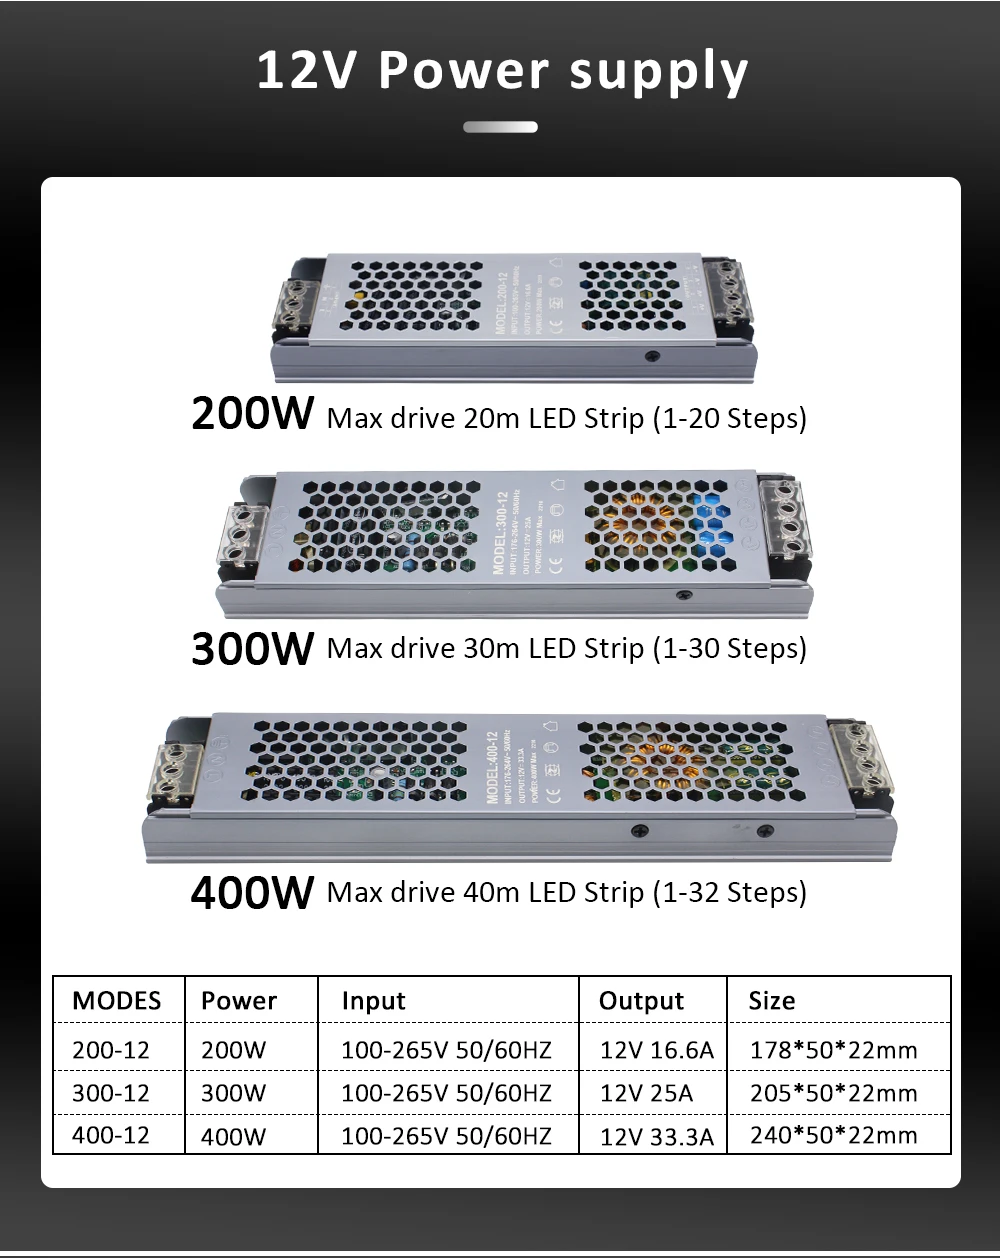
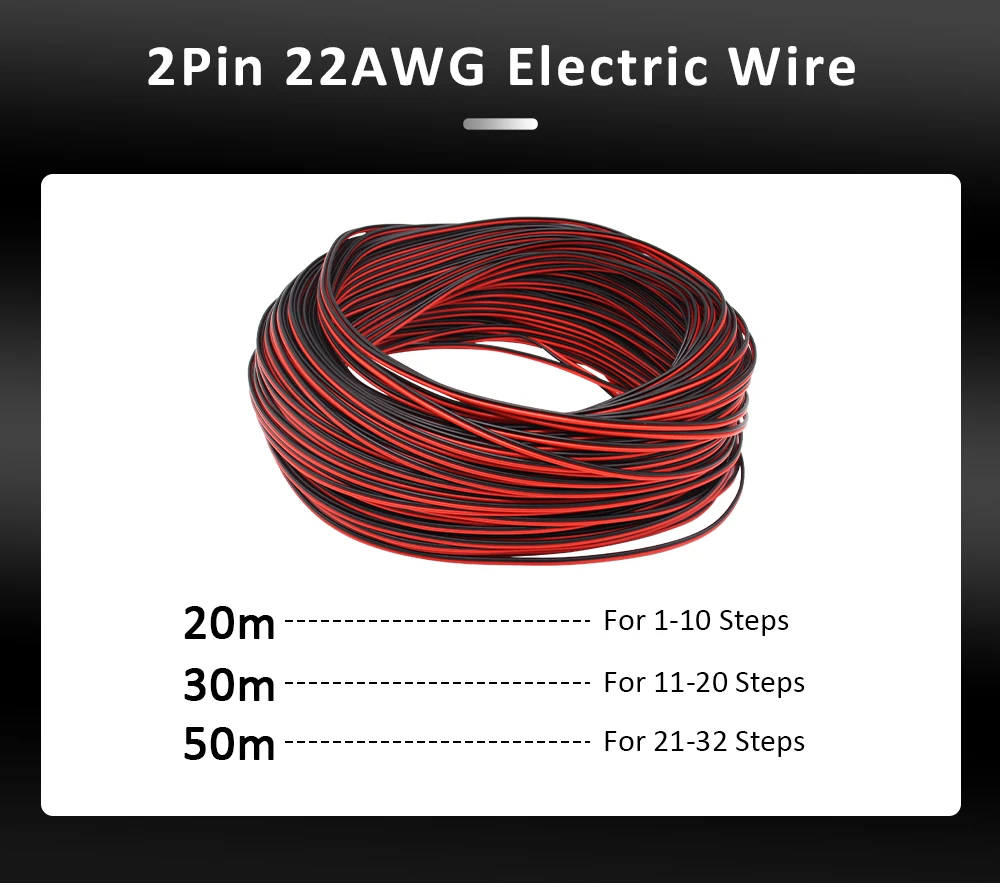
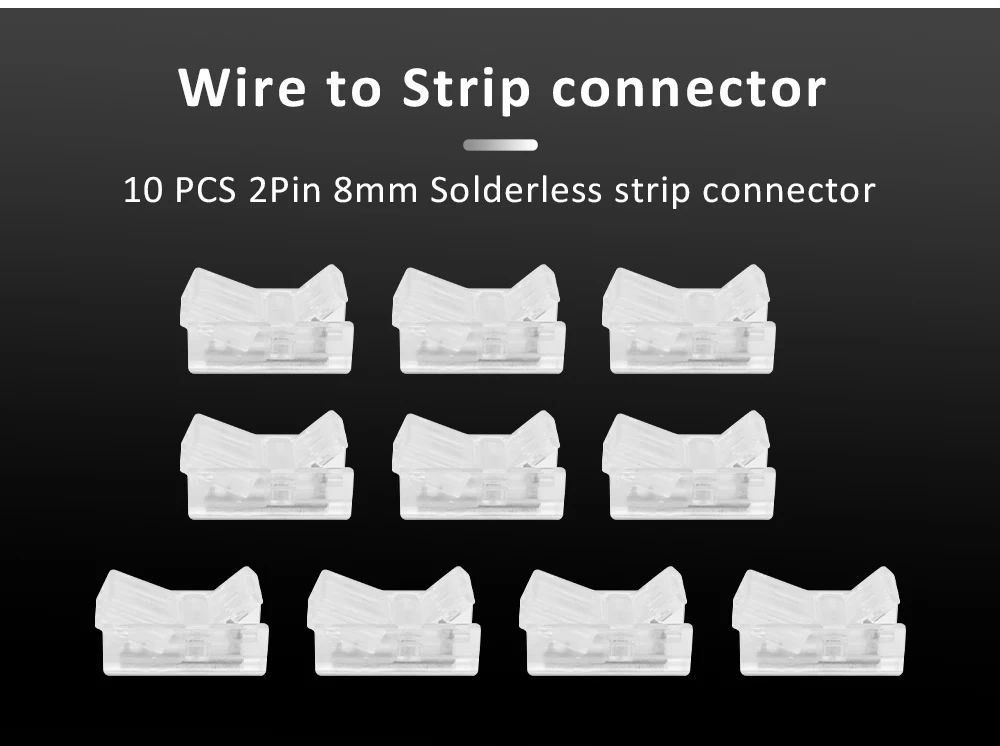
옵션정보[(771)Controller] [(193)CW LED Strip] [(193)CW LED Strip] [(173)WW LED Strip] [(173)WW LED Strip] [(365458)NW LED Strip] [(365458)NW LED Strip] [(350850)200W Power] [(350850)200W Power] [(691)300W Power] [(691)300W Power] [(175)400W Power] [(175)400W Power] [(200002130)20m Electric Wire] [(200002130)20m Electric Wire] [(350852)30m Electric Wire] [(350852)30m Electric Wire] [(1052)50m Electric Wire] [(1052)50m Electric Wire] [(496)Connector] [(496)Connector] 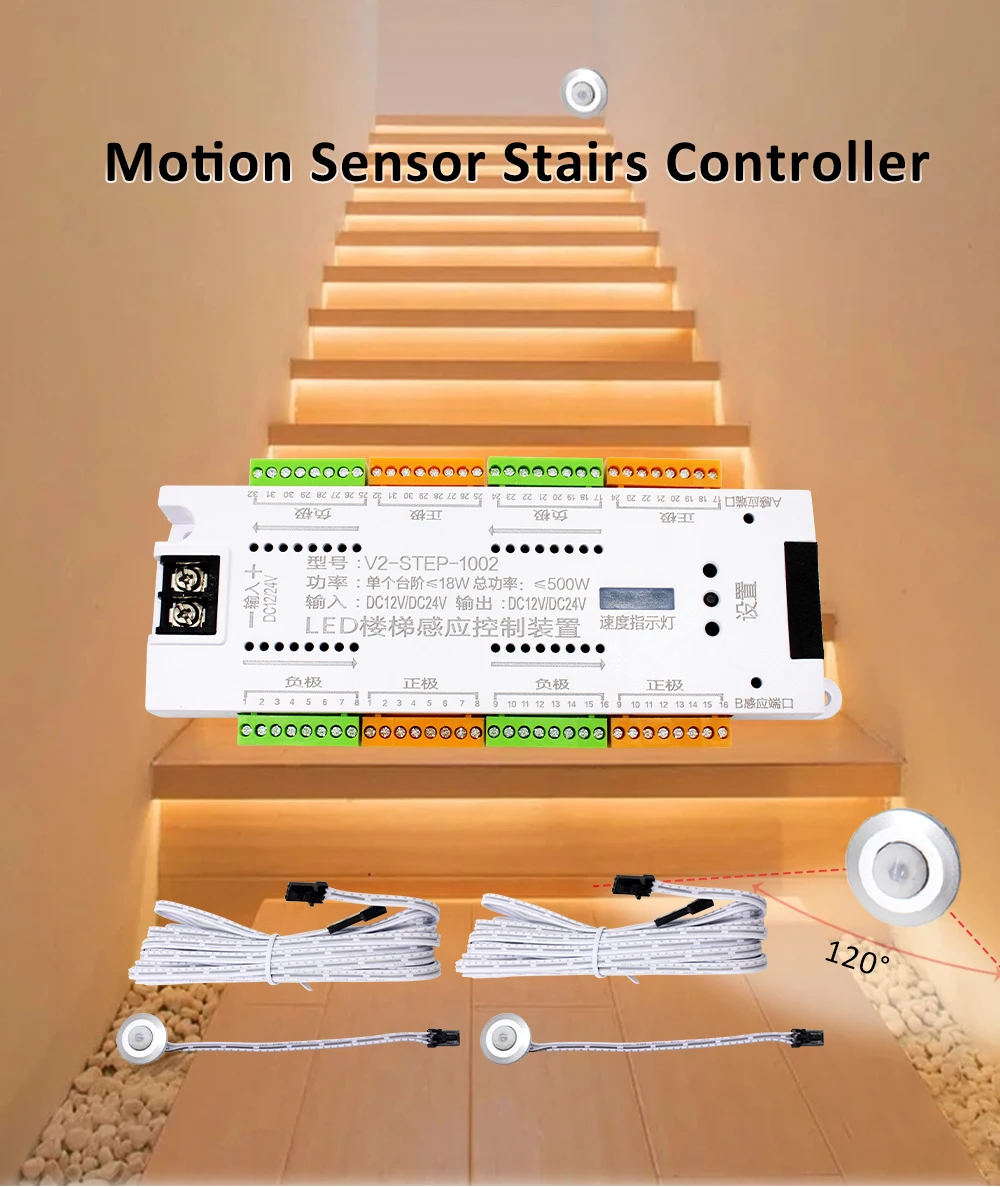
Product description:
Product name: 32-channel stair sensor
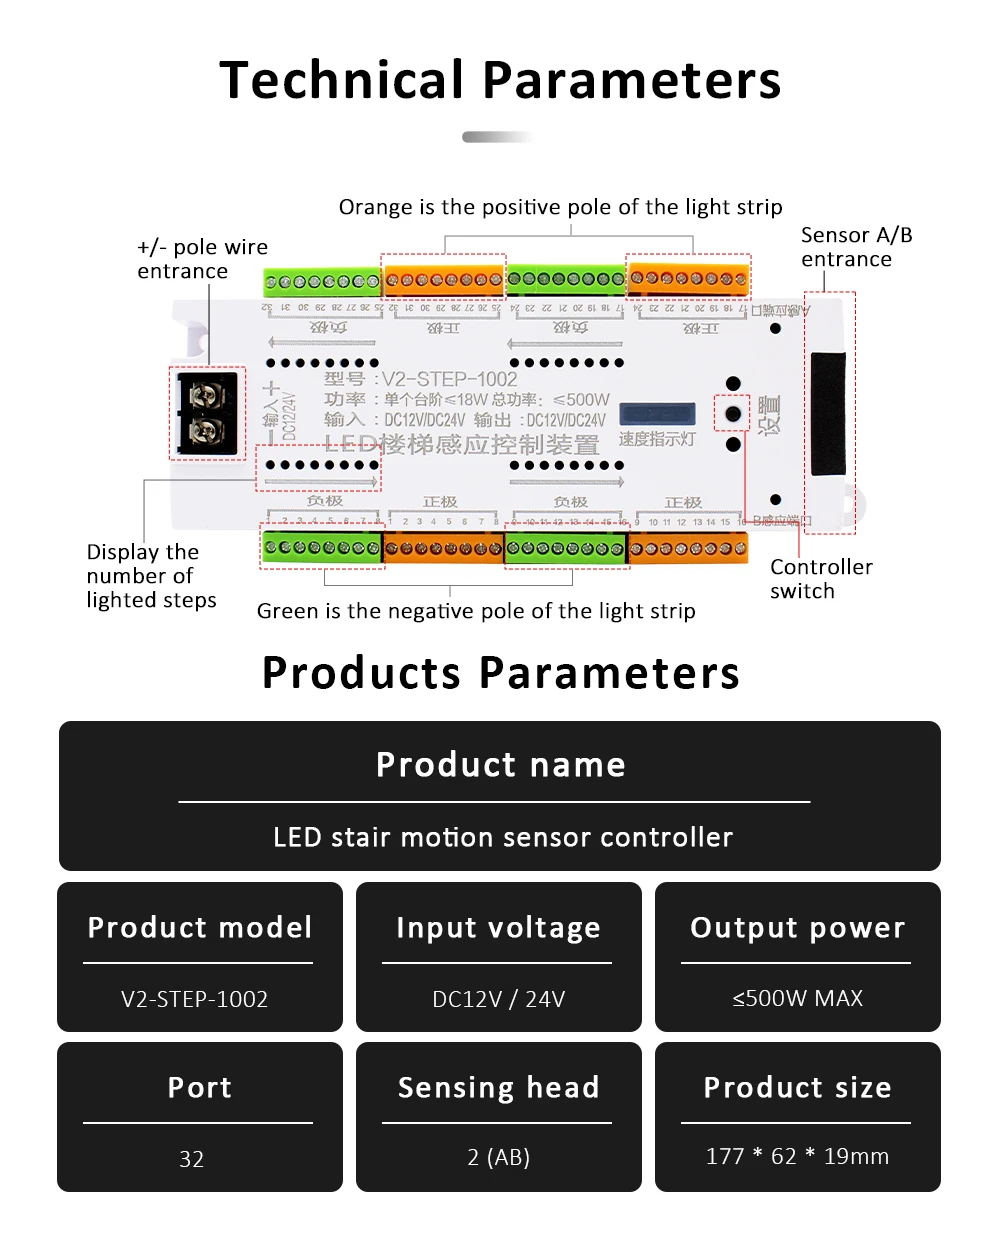
Voltage: DC12V/DC24V
Power: 500W MAX
Channel: 32 (set to 1-32 step)
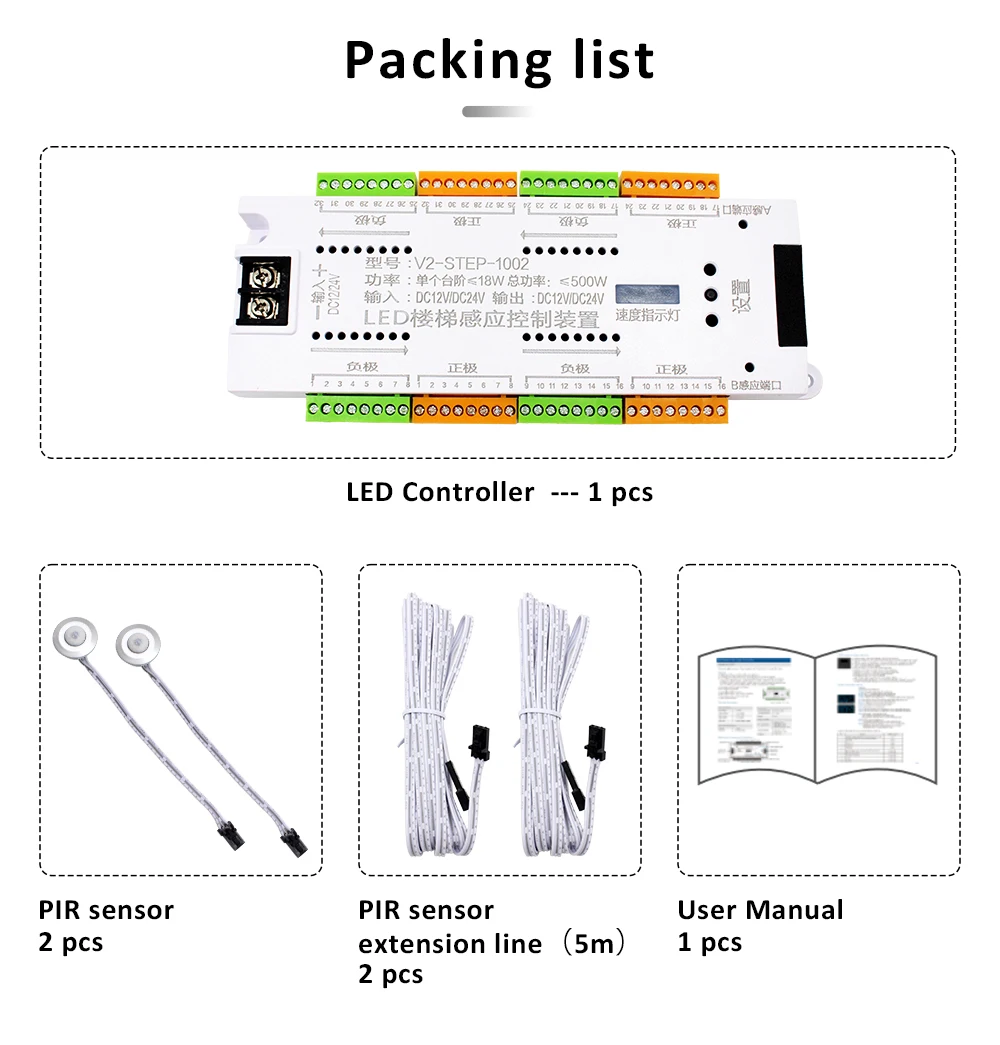
Sensors: 2 Pir Sensor
Product function description:
1. Press the key quickly to adjust the speed of the light strip. There are four gears (60 seconds, 45 seconds, 30 seconds, 15 seconds)
2. Press and hold the key for 5-6 seconds to enter the step setting mode.
*Long press the switch once to set the first step stairs, *Short press the switch a second time to set the second step stairs,
*Short press the third time to set the third step stairs, and so on.
3. After the operation is completed, press and hold again for 5-6 seconds to automatically save the corresponding settings.
NOTE:
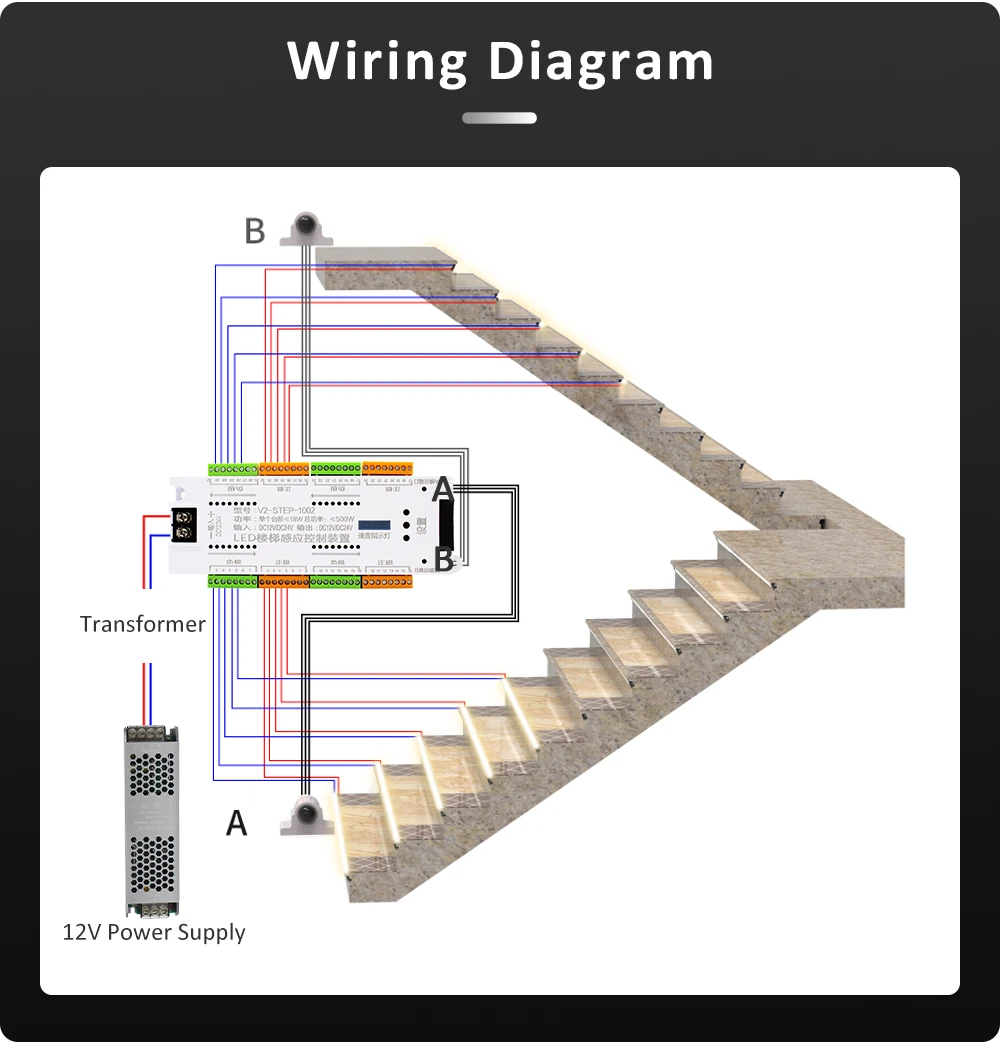
1- A/B sensors need to be installed at the entrance and exit of the stairs and face the human body.
2- The product is low voltage 12V-24V, need to connect transformer. Do not directly connect 220V, it will burn the controller.
3- The product is not waterproof.
Important note: The positive and negative terminals of the power supply input of the controller cannot be reversed, the red wire V+ is connected to the positive electrode of the switching power supply, and the blue (or black wire) V- is connected to the negative electrode of the switching power supply.
Product package:
1PC LED controller( Not included the led strip and power supply )
제품 설명: 제품명: 32 채널 계단 센서
전압: DC12V/DC24V
전력: 500W MAX
채널: 32 (1-32 단계로 설정)
센서: 2 Pir 센서 제품 기능 설명: 1. 키를 빠르게 눌러 라이트 스트립의 속도를 조정하십시오. 4 개의 기어가 있습니다 (60 초, 45 초, 30 초, 15 초)
2. 키를 5-6 초 동안 길게 눌러 단계 설정 모드로 들어갑니다.
* 스위치를 한 번 길게 눌러 첫 번째 단계 계단을 설정하십시오. * 스위치를 두 번째로 짧게 눌러 두 번째 단계 계단을 설정하십시오.
* 세 번째로 짧게 누르면 세 번째 단계 계단을 설정할 수 있습니다.
3. 작업이 완료되면 5-6 초 동안 다시 길게 눌러 해당 설정을 자동으로 저장하십시오. 참고: 1- A/B 센서는 계단의 입구와 출구에 설치하고 인체를 향해야합니다.
2-제품은 저전압 12V-24V, 연결해야합니다 변압기. 220 V를 직접 연결하지 마십시오. 컨트롤러가 구워집니다.
3-제품이 방수되지 않습니다.
중요 사항: 컨트롤러의 전원 공급 장치 입력의 양극 및 음극 단자는 되돌릴 수 없으며 빨간색 와이어 V + 는 스위칭 전원 공급 장치의 양극 전극에 연결됩니다. 파란색 (또는 검은 색 와이어) V-는 스위칭 전원 공급 장치의 음극 전극에 연결됩니다. 제품 패키지: 1PC LED 컨트롤러 (LED 스트립 및 전원 공급 장치는 포함되지 않음)
|
|
|
|
|


 배송기간
배송기간